I’m one of those people who loves pizza crust. I actually didn’t know there was any other type of person until I married one of those people who would leave the edges of his crust on the plate after eating his slice. Lucky for him, he married a helpful lady who was more than willing to eat them on his behalf.
Since going gluten-free, my pizza stone has been awfully lonely (that’s only partially true. I actually never take it out of my oven because a.) I always forget to put it in before preheating the oven, and b.) it’s super heavy and I’m super lazy, so it’s been hanging out in my oven. But it hasn’t served any real purpose since the last pizza I made before going GF). I just didn’t want to be depressed by one of those crispy, cracker-thin gluten-free pizza crusts that I see all over the internet. I’m going to drop a little truth bomb here: If it’s crunchy and/or breaks in half when you fold it or bite into it, it’s not a pizza crust. It’s not that it’s bad! By all means, it may taste great! But don’t try to fool me into thinking it’s the same as a chewy, doughy pizza crust. It’s just like that one-ingredient, banana “ice cream.” Sure, it looks like ice cream and it tastes alright, but you can’t fool me! I know it’s just a pureed frozen banana. It is not the same as regular ice cream (vegan, of course), guys!

But I digress. I’ve been plenty sad about the lack of pillowy clouds of pizza crusts in my life since giving up gluten. Until I started recipe testing for my gluten-free flatbread. Once I bit into one of those beauties, I realized that with a little bit of yeast, a puffy, chewy gluten-free pizza crust could very well become a reality.
Just like the gluten-free flatbread, this pizza crust uses aquafaba to replace some of the water in a normal pizza dough recipe. This helps hold the crust together and make it completely the opposite of crumbly or cracker-like. There are also a couple other tricks to keep in mind:
1. Be careful when adding the flour. Once you have your liquid mixture added to the bowl, add 1 cup of flour, then a 1/2 cup, and then 1/4 cup. Don’t go overboard on this. You want your ball of dough to hold together without sticking to your fingers, but it should still be sticky/tacky to the touch. Where a non-gluten-free ball of dough would be dry-ish and smooth, this ball will still be a little wet. If you add too much flour, try adding water by the tablespoon to achieve the correct texture but you will still want to be careful. Too much flour will make the ball too heavy and it will not rise.
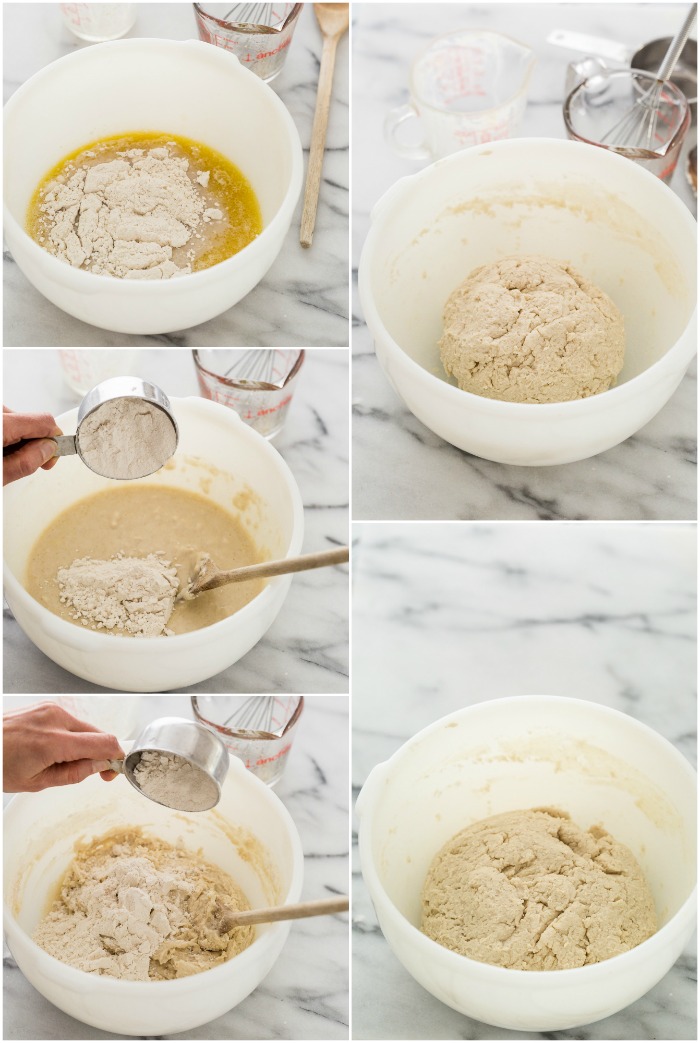
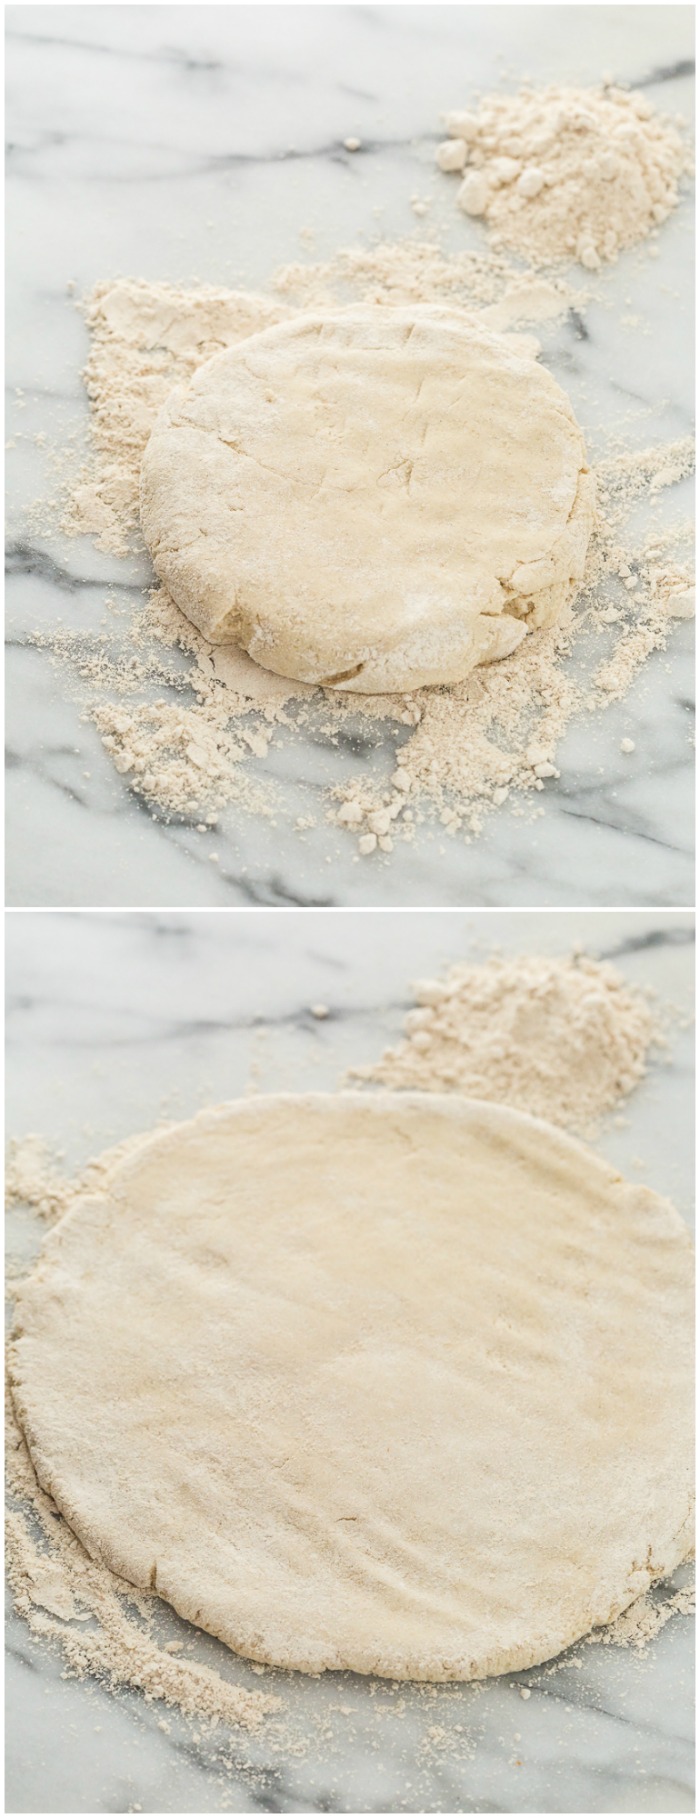
2. After rising, you will need to knead the ball of dough and roll it around on a floured surface a bit. When you first start working with it, it will be delicate and will tear when you fold it over on itself. Once you work with it, kneading and rolling it, it will be come a tougher, softer, more pliable dough.

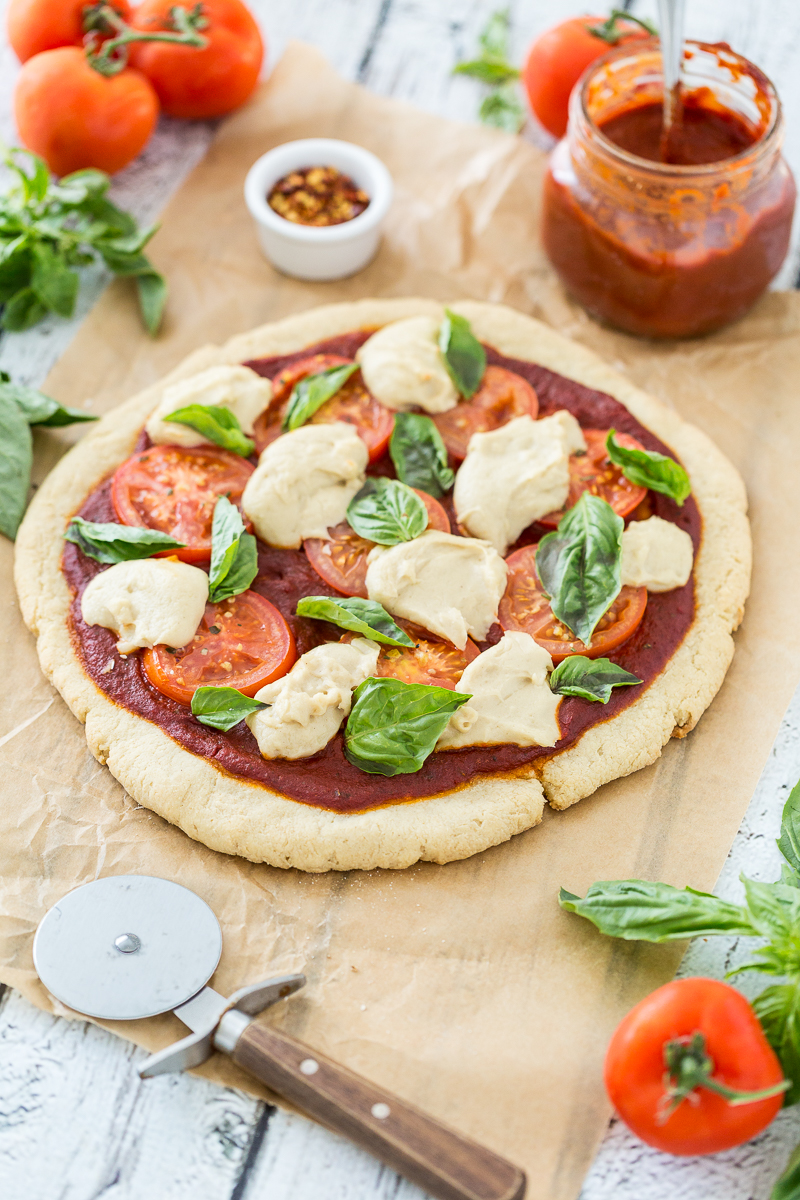
3. Once you’ve made the dough pliable, you’ll need to work fast (or it will be come delicate again). Pat the dough into a disk and then flip it, pat it some more, flip it again, and continue with the pat and flip routine until you have a roughly 10 to 11-inch pizza crust. It will be thicker than a normal pizza crust, prior to baking (normally you would roll the dough pretty thin), but that’s okay. Quickly transfer the dough to the baking stone in your oven or a pizza pan/baking sheet and place in the oven. You will need to bake it, without toppings, for about 10 minutes to allow it to rise properly.
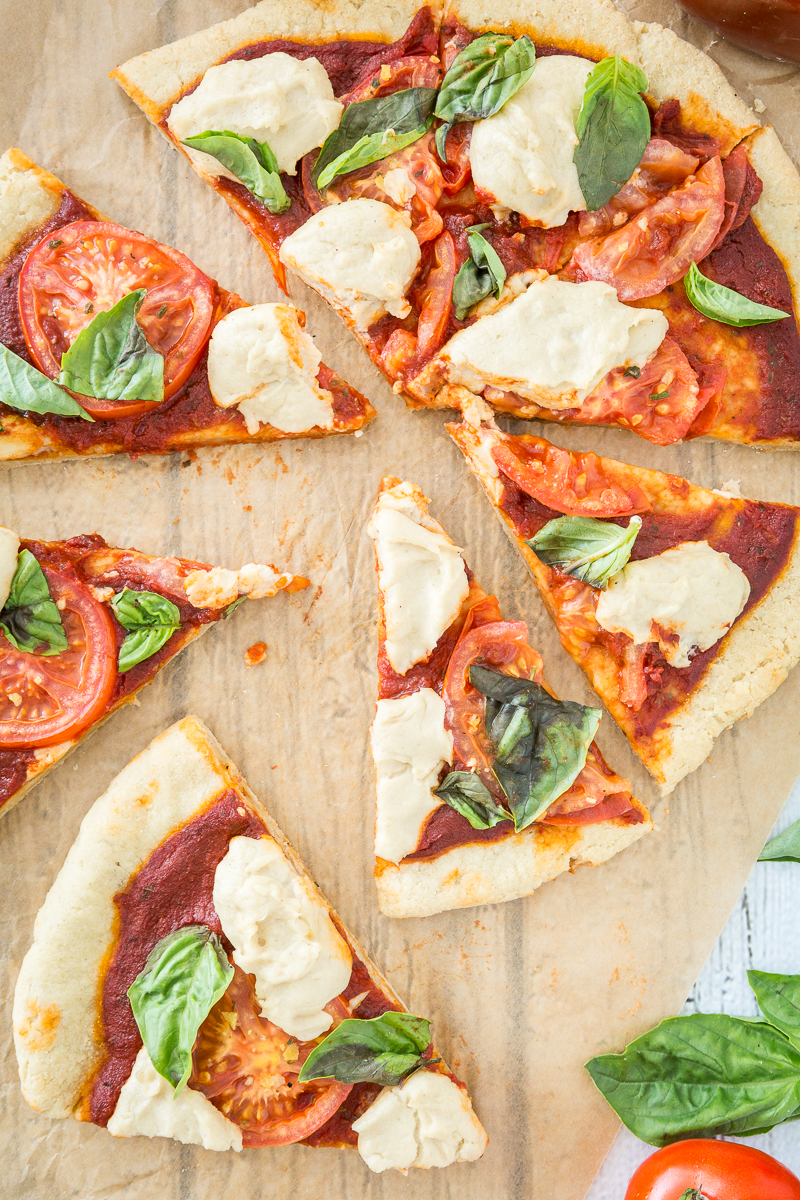
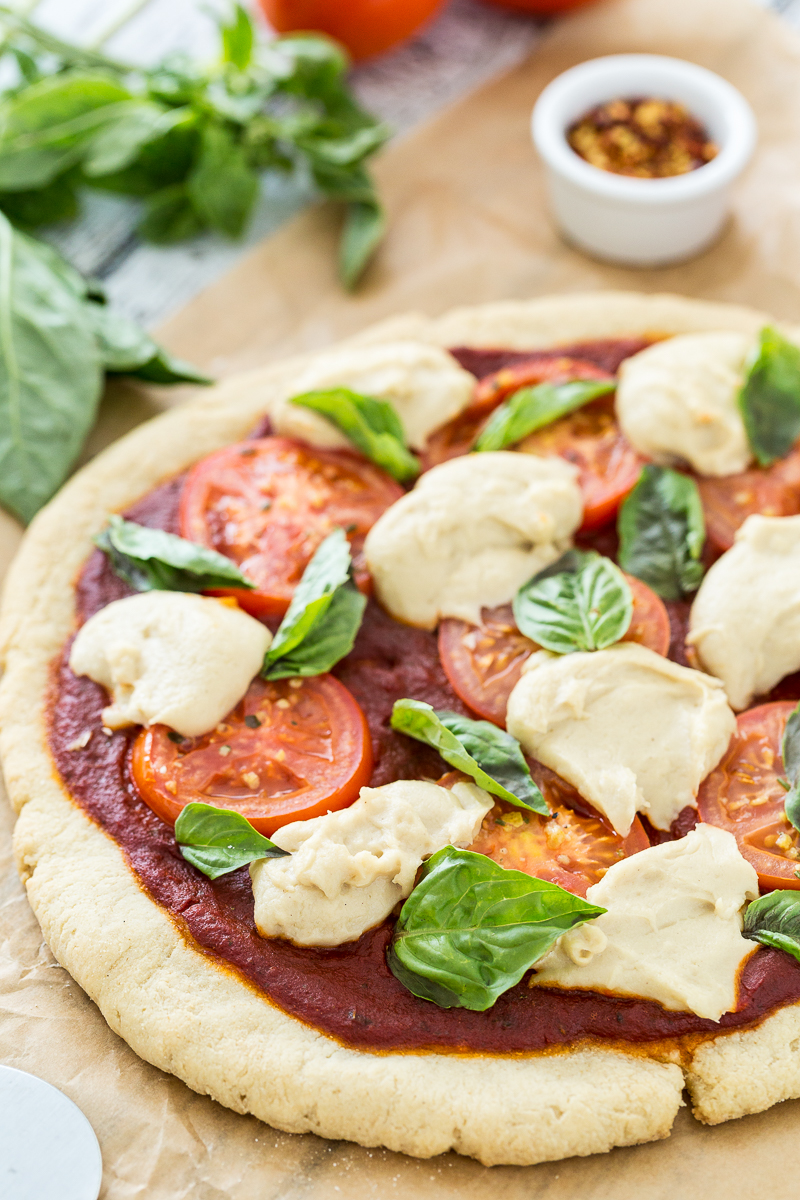
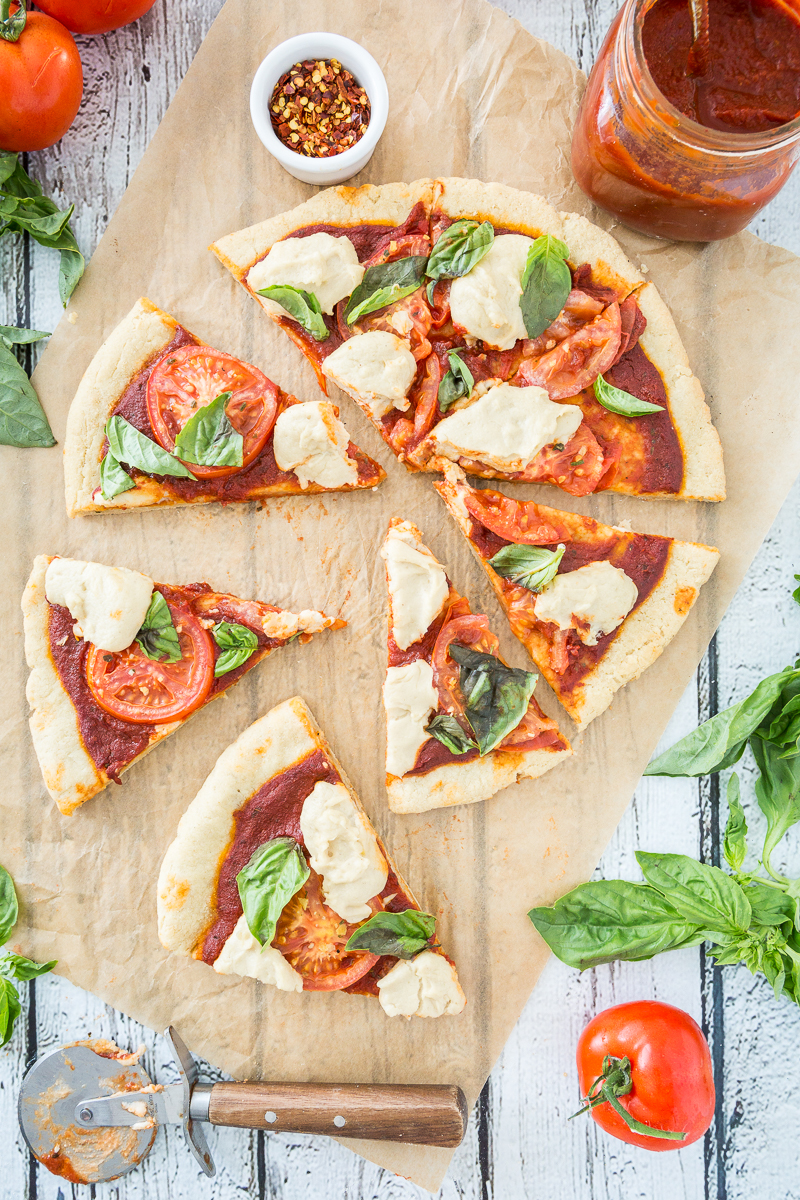
After baking the crust alone, letting it rise and and firm up a bit, you can remove it and add your toppings. Since I wanted a Margherita pizza, I just spread a quick and easy sauce (that I’d prepared while the dough was rising) on it, placed a few sliced tomatoes, and then dropped on dollops of my Macarella (straight from the pot, before letting it firm up) from But I Could Never Go Vegan!. I prepped the cheese while the dough was rising and then transferred it to the pot, along with the agar powder, and let my stepdaughter cook it while the crust was baking. Easy peasy. You could use any old vegan mozzarella cheese, though. I think Teese would work really well in this recipe, or you could even whip up a simple cashew cheese sauce and drizzle it over the top (that’s what I did for my first trial of this recipe and it was perfect!).
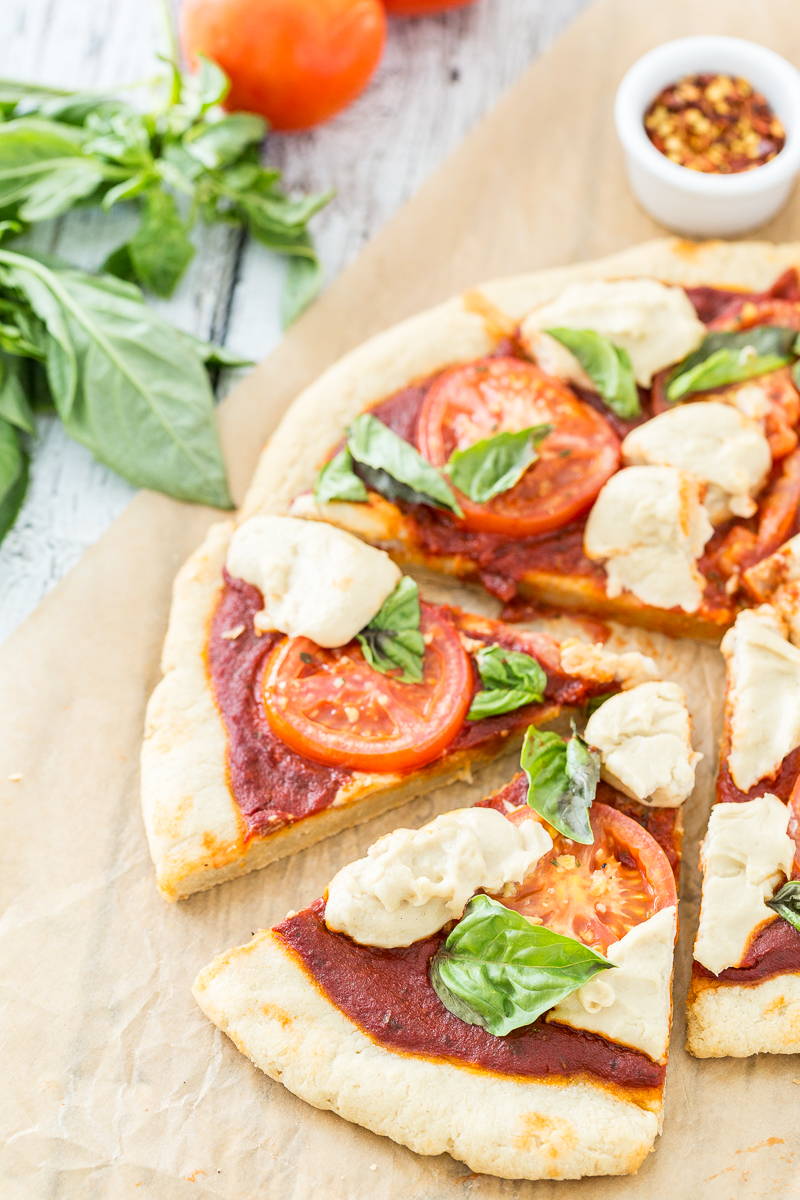
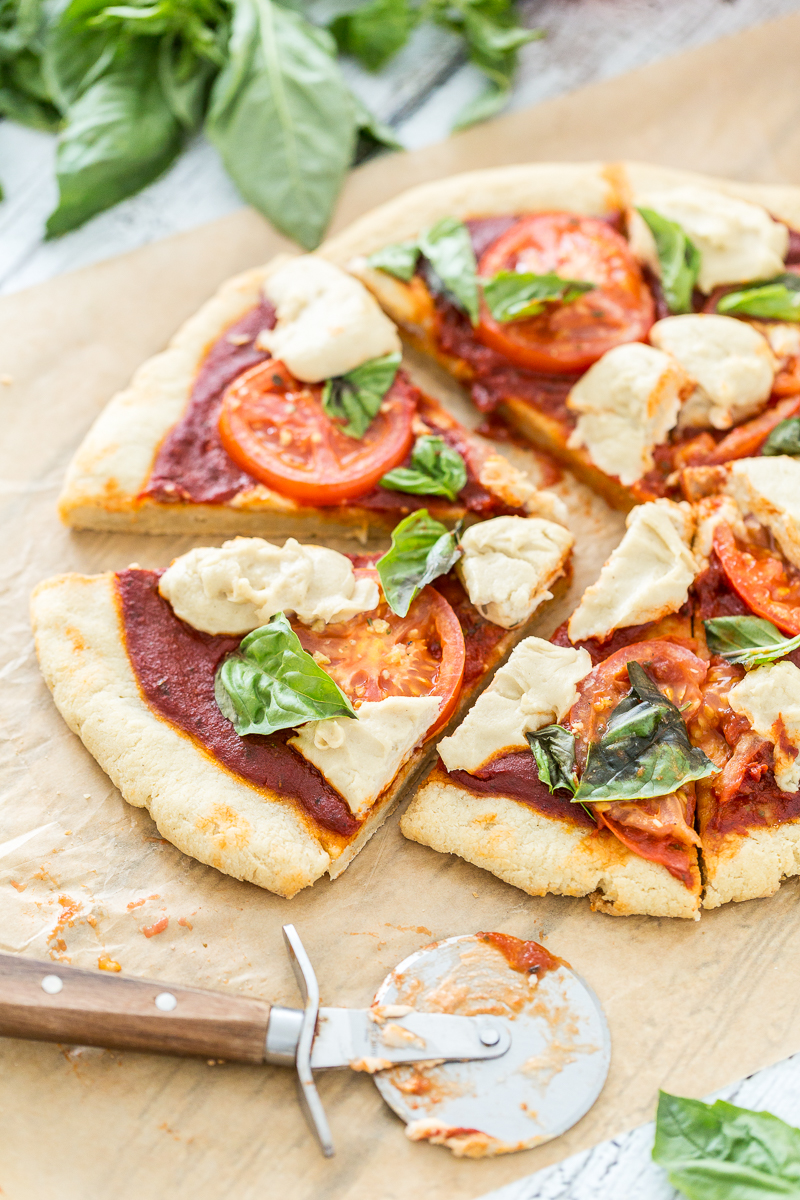
After letting it bake for about 7 more minutes, I removed it, threw on the basil leaves and went to town (and by “went to town,” I mean I stuffed my face with this luscious pizza). I’ve actually made this pizza at least 4 times (it’s a rough guess- my memory is fuzzy). There was the first time I made it, just to test it. Then I wanted to make it again to shoot it, and I added too much flour and it didn’t rise. It was still good, but not as puffy. The third time, everything was going great and we shot all the prep pictures before realizing that I’d forgotten to buy fresh basil (I wish I could say forgetting a vital ingredient was a rare occurrence in my grocery shopping history, but that would be a huge, fat lie), so we just ate it, sans basil. Finally on the fourth go, all the stars aligned and the pizza turned out perfectly (and so did the pictures!).
So, my gluten-free friends, you can now rejoice and reclaim the doughy, chewy, pillowy pizza crust of your past. For those of you who can eat all the gluten you want [fancy pants!], you can make this pizza using my regular pizza dough, though you may want to give this a try. My husband loved it so much, he ate all the crusts for the first time in the history of our marriage!
Ingredients
- 3/4 cup water, heated to 110 F
- 2 1/2 teaspoons yeast
- 1 teaspoon sugar
- 1/2 cup aquafaba (chickpea brine)
- 2 tablespoons olive oil
- 1 teaspoon salt
- 1 teaspoon baking powder
- 1 3/4 cup Bob’s Red Mill Gluten-Free 1-to1 Baking Blend, divided + extra for flouring your surface (you can use a different GF flour to flour the surface if you’d like. I use oat flour)
- olive oil spray
- one 15-ounce can unsalted tomato sauce
- one 6-ounce can tomato paste
- 1/2 cup water
- 1 tablespoon olive oil
- 1 teaspoon dried basil
- 1 teaspoon dried oregano
- 1/4 teaspoon garlic powder
- salt and pepper to taste!_
- 2 to 3 tomatoes, sliced
- Macarella from But I Could Never Go Vegan! or a homemade cashew cheese sauce, or a store-bought vegan mozzarella
- fresh basil leaves
- red pepper flakes, optional
Instructions
- In a cup, combine the heated water, yeast and sugar. Stir gently to combine and then let sit and let the yeast activate for about 10 minutes.
- In a large bowl, combine the brine, olive oil, salt, and baking powder. Once the yeast is fully activated, add the water/yeast mixture to the bowl and whisk to combine.
- Add 1 cup of GF flour blend to the bowl and stir until just combined. Add a 1/2 cup of the flour and stir until combined. Add 1/4 cup of flour and stir until combined. The mixture should hold together without sticking to your fingers, but still be wet and sticky to the touch. If it’s too sticky (sticking to your fingers), add flour by the tablespoon until the correct texture is achieved. If it’s too dry (not wet/sticky to the touch), add water by the tablespoon until the correct texture is achieved.
- Place the ball of dough in a bowl sprayed lightly with olive oil (or pick the ball up and spray the inside of the bowl you’ve been working in with oil). Cover the bowl with a kitchen towel damped with warm water. Place the bowl in a warm, draft-free area and let the dough rise for 1 hour.
- While the dough is rising, make the sauce. In a medium pot, combine the sauce ingredients and bring to a boil. Reduce the heat to a slow simmer and let simmer, stirring occasionally, for about 15 to 20 minutes. Remove from the heat and set aside.
- Preheat the oven to 450 F. If using a pizza pan or baking sheet, get it out and lightly spray it with olive oil. Lay your tomato slices out on a couple sheets of paper towel. Sprinkle them lightly with salt and pepper. Let them rest until ready to use.
- If using a pizza stone, make sure it is in the oven as soon as you start preheating it.
- Once the dough has risen, turn it out onto a floured surface. Roll the ball around in the flour and knead until the dough it tougher, softer, and more pliable. Pat the dough into a disc, flip and pat the disc a bit until it is a slightly larger disc. Continue flipping and patting until you have a 10 to 11-inch pizza crust. Transfer the crust to your pan/stone, spray the crust, particularly the edges, with olive oil, and bake for 10 minutes.
- Remove the crust from the oven and spread pizza sauce over the top, leaving an inch around the edge clear. Top with sliced tomatoes and Macarella or vegan cheese of your choice. Return the pizza to the oven and let bake for another 7 to 10 minutes or until the crust is fully risen and golden, and the cheese has melted and/or browned. Remove from the oven, top with basil leaves and red pepper flakes (if using), slice, and serve immediately. Enjoy!
Notes
You may try another gluten-free flour blend, if you’d prefer, though I haven’t tested it so I can’t guarantee the results.