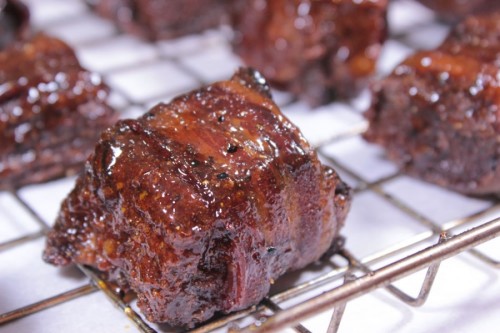
The new motto is: “bacon wrapped smoked burnt ends, just because you can!”
- Prep Time: 35 minutes
- Cook Time: 2-3 hours
- Smoker Temp: 225°F
- Meat Finish Temp: n/a
- Recommended Wood: Mesquite and/or Pecan
- Point of brisket (thicker end), already cooked to about 200°F*
- Jeff’s barbecue sauce (purchase recipes here)
- Jeff’s original rub (purchase recipes here)
- Foil pan
- Thin sliced bacon
*You can also use a smoked chuck roast for this. See instructions below.
Last week, I showed you how to smoke a brisket from start to finish and those instructions are archived HERE.
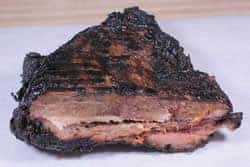
When it got finished, we separated the flat part of the brisket from the thicker, more fatty end called the point. The point is used to make the burnt ends.
This is not to say that you can’t slice up the flat end to make burnt ends if you want to.
Brisket is really expensive right now and you may find a chuck roast to be a little easier on the wallet.
Smoke the chuck roast at 225°F until it reaches 160°F. Then wrap it in foil and continue cooking it until it reaches about 200°F. It can then be cubed or cut into smallish pieces, coated with sauce and rub and smoked again at 225°F for about 2-3 hours or until the sauce and rub caramelize on the outside of the meat really well.
They actually are not burnt anything but rather cube shaped pieces of the brisket from the fatty end that needed a little more time in the heat to render out the rest of the fat. This process yields some of the best tasting pieces of brisket you’ll ever put in your mouth.
Once you remove the flat end, you will notice that there is a thick vein of fat that runs through the middle of the brisket. I run my knife along the bottom of this to separate them.
See that fat vein in the middle?
Separated with one fail swoop of my very sharp knife.
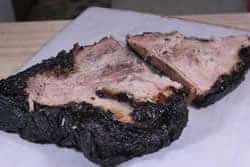
Now just slice/remove the fat from the top of the pieces.
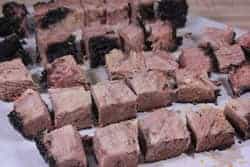
Slice the meat into pieces that are about 1 to 1-1/2 inch thick.
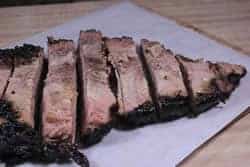
Further cut the thick slices into pieces as shown below.
I don’t like the burnt ends to be overly saucy but that’s just me. If you like them that way then sauce away.
Just a little on each one to start.
Sprinkle on the rub generously then roll them around to coat well.
If you want more rub, you can also place some rub in a plate and roll the sauced brisket pieces in the rub.
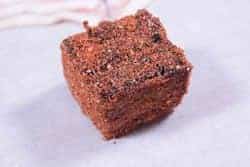
The rub and sauce together is what makes that nice caramelized coating on the outside that tastes so good.
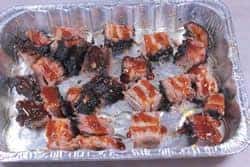
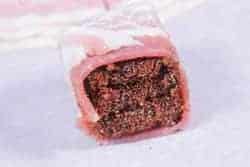
Now that the little tasty morsels of goodness are covered in a nice layer of sauce and rub, you can cut pieces of thin bacon in half and wrap each one.
The size of the bacon is dictated by the size of the beef cubes. If you make them smaller than I did, you may be able to use the bacon in thirds. Do a test on this before you cut all of the bacon in half.
Nearly all of my recipes can be made on any smoker or grill and this one is no exception. I have made these on the grill as well as multiple smokers including electric, propane, charcoal and wood (stick burners) and they all work very well.
Setup whatever smoker or grill you have available for cooking at 225°F. If you just got finished cooking the brisket, it is most likely already hot and ready to go.
If not, give it a chance to preheat before moving forward.
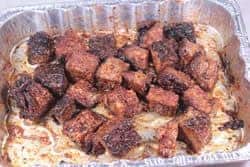
I would like to note that I usually do burnt ends in a foil pan however, with the bacon wrapped version we are making in this recipe, I recommend using a Bradley rack or something similar to give them open access to the heat and smoke.
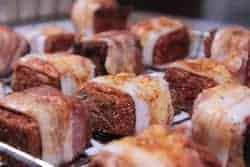
You can also crank up the heat to help the bacon to crisp up a little bit. Using thin bacon helps a lot.
Apply smoke from mesquite, pecan (or almost any other smoking wood) the entire time they are in the smoker for best results.
Brush on a little sauce if desired about 30 minutes before removing them from the heat.
Serve ’em up and Enjoy!


